Basket weave leather stamping is really intimidating to many people but it doesn’t have to be difficult. I have been working on a way to explain the techniques I use in my basket stamping (and really any stamping with a basket weave or geometric stamp) and I’ve come up with this tutorial as a starting point. I decided to begin with the simplest form of basket stamping where you are stamping in a straight line across the leather. Later I’ll write up a tutorial on angled basket weave stamping, which is more complicated but what I use most of the time.
Step 1:
Here is the cased leather I’ll be using for this tutorial. It’s a money clip wallet back and I’m going to place a straight line of basket weave stamping down the length of it.
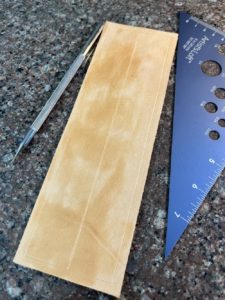
NOTE: I am right handed so all the descriptions and directions are what works for me. If you are left handed most likely you will do everything in the opposite direction from what I’m writing here.
I start out by making a faint line across the middle of the leather. This will be my guide line for the first row of stamps. Note that I made this line very bold for this picture. Normally I would try to make this a faint mark but in this case the stamp will always be placed over the line so no part of the guideline will be left once I’ve stamped the whole piece.
I’ve also marked the border on the piece because later I will need to make sure I don’t stamp past the border lines.
Step 2:
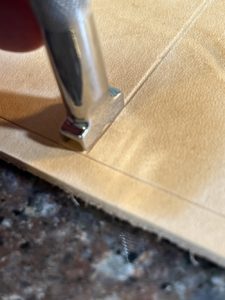
I start by placing the basket stamp with one side right on the line and with the back edge right up against the border. Take your time and line this up carefully. This first row is the base for all the stamping on the rest of the project and any problems here will lead to more problems across the rest of the project.
Step 3:
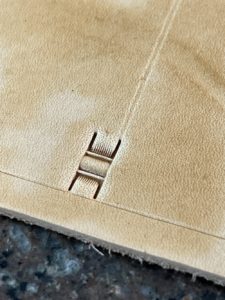
Here is the first stamp impression. Note the legs of the basket stamp are right on the line I marked on the leather. You want to keep the stamp aligned straight with the guide line as much as possible.
Step 4:
Time for the next stamp impression. Move the tool so you are making an impression with the other side of the stamp on the guideline as shown in the picture. The next impression will still be along the guideline but with the back leg of the basket stamp overlapping the first impression. The leg of the second impression should drop in perfectly to the leg of the first impression. As long as the side of the stamp is lined up along the guide line, you will keep your stamps going in a straight line.
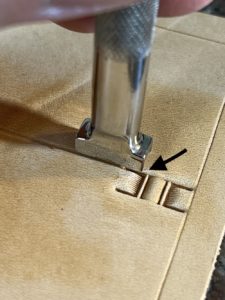
Here is main secret to how I stamp and keep the whole project straight and uniform. Note the black arrow in the picture pointing at where the back of the stamp is sitting. There is a slight gap between the back of the stamp and the center bar in the first stamp impression. This is very intentional and it’s about the width of the leg of the stamp. This extra space is a bit of play we will keep between all of the impressions. As things get a bit off or crooked, this amount of play will allow us to adjust and keep things from getting far off. If we stamped the impression right against the center bar there would be no room for error in the stamps around it and eventually you would end up with stamps crowding each other and the overall project would be crooked.
Step 5:
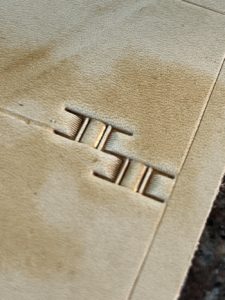
Here is the second impression. It’s on the other side of the guide line but still has its legs lined up with the guideline. Again, take you time making each of these first impressions and make sure they line up. The time and patience you show here at the start will pay off in the end.
Step 6:
Now it’s time to repeat back on the other side of the line. Again place the legs of the stamp in the last impression and make sure you have the same small gap between the back leg of the stamp and the center bar of the last impression. It’s important to try and be as consistent with each impression as possible and to try and keep that slight gap the same for each impression. Again your patience will be rewarded.
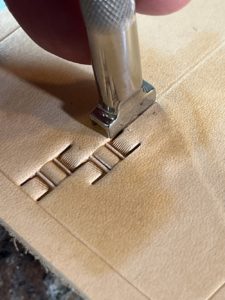
Also note that while I’m stamping this first row this is basically my view. I’m always looking from the side to see how well it lines up with the guide line. Once I finish this first row I’ll change how I look at the leather but for now I want to focus on making sure each impression lines up along the line and has the right spacing.
Step 6A:
First three impressions made. About a few hundred to go.
Step 7:
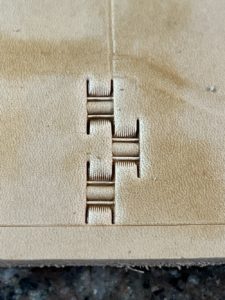
This view shows more stamps running along the line as I continue to work my way across the piece of leather. Again, keep the legs of the stamp on the guideline and try to make the space consistent between each impression.
Step 8:
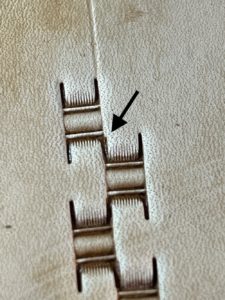
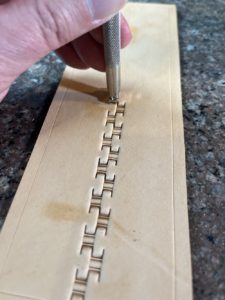
This pictures shows how even when you are trying to carefully line things up slight accidents will still happen. The black arrow is pointing to where the previous impression was slightly off the line and you can see it is not quite lining up with the next impression. We are all human so slight errors like this are UNAVOIDABLE. This slight error causes the row next to it to be slightly off. As you expand the stamping the errors like this compound which is why we tend to start off nicely but end up with our basket stamping being all over the place by the time we finish. It’s that slight gap between the back of the stamp and the center bar that allows us the freedom to correct this kind of problem as we go along.
Step 9:
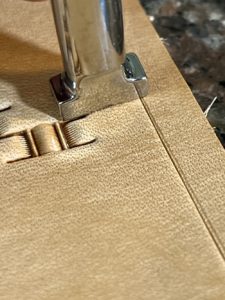
Once we reach the other side most of the time the stamp isn’t going to line up with the border. In this case I tip the tool on end so I’m just making a partial impression. I line up the legs just as before but tilt it up slightly so that when I strike the tool I only make an impression inside my border.
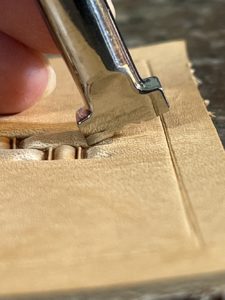
The second picture here shows the tilt from the side and I’ve exaggerated how much I tip it, but you do need to tip it more than you think. If you don’t you’ll end up accidentally making faint marks on the other side of the border.
Step 9A:
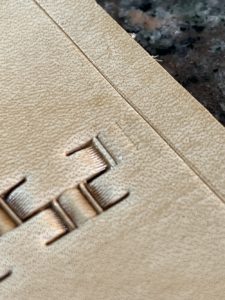
Here’s the impression of the tipped stamp. Don’t worry that there is a pretty large gap between the partial stamp impression and the border. We’ll fill that in with a border stamp later.
Step 10:
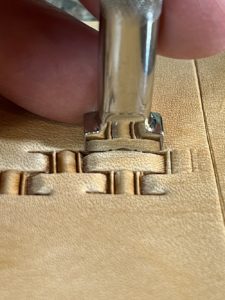
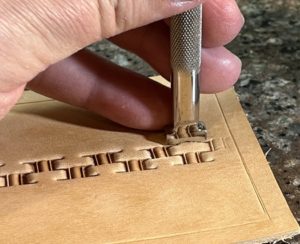
Now that I have my baseline across the project, I start stamping the area to one side of it. To do this I’m going to reverse the direction I’m adding new stamps. I now will be stamping from right to left (I’m right handed but you are left handed you will most likely reverse this) I start by lining up the legs of stamp inside the two stamps that are already on the leather. Note that I’ve rotated the project about 90 degrees and this is how I view the project in these two views. This way I can most clearly see where the stamp sits in the existing impressions.
Here is another key trick I use to keep things straight and neat. In the closeup picture you can see I’ve lined the stamp up with equal amounts of extra space on either side of the stamp. This is where having that small gap between the stamps pays off. From now on whenever you make an impression always try to keep the extra space on either side of the stamp equal, or stated another way keep the stamp centered between the two existing impressions. Also try to keep the stamp running in a straight line with the existing impressions. If you do these two things each time you stamp a new impression, it will help average out any slight errors we’ve made already and keep the stamp impressions form crowding each other. Paying attention to these two key details will go a long way to improving your basket stamping.
Step 11:
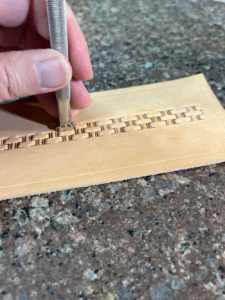
This shows several impressions I’ve made as I follow along my existing row of stamps, working from right to left. On each one I try to center the stamp between the two existing stamps and keep the stamp aligned with the existing stamps. This stamping will go faster than the initial row.
Step 12:
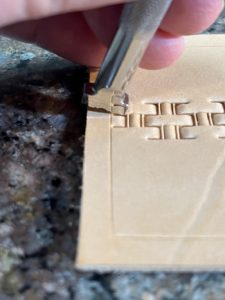
I’ve reached the end of the line again and again the stamp is running over the border. Just like before I tilt the stamp so I only make a partial impression. The second picture shows I only get an impression of the legs of the basket weave, but that leg impression is what I’ll use to line up the next row.
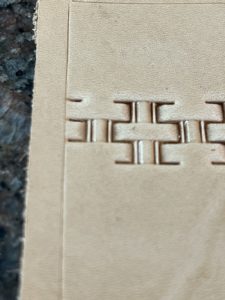
Step 13:
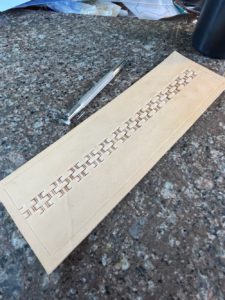
Here’s where we are at this point. We stamped a straight line across the project from left to right and then stamped one row of stamps back across from right to left. For the next row I’ll go back to the right and stamp another new row, tilting the stamp up at each end as necessary. I’ll keep doing that until I have filled up that side of the project and it looks something like…
Step 14:
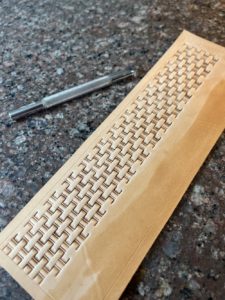
Here I’ve added all the full rows I can on one side of the project and I’m bumping up against the border. For each stamp I’ve followed my process of making sure each new impression is centered between the two existing stamps and I check to make sure I’m keeping the stamp aligned straight with the existing rows. Fortunately it has come out pretty even with the border.
Step 15:
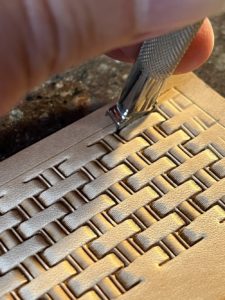
Now I am working on stamping as close to the border as possible by tilting the stamp towards me and making partial impressions. I still make sure to place the stamp centered between the two existing impressions and keep the stamp straight with the other impressions. I just want to be careful to leave as few marks as possible in the border area.
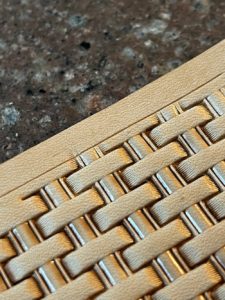
This closeup shows the partial stamp impressions and if you look carefully you’ll see I left a slight impression of one of the legs in the border. You can get rid of this by using a modeling spoon to gently rub the mark out.
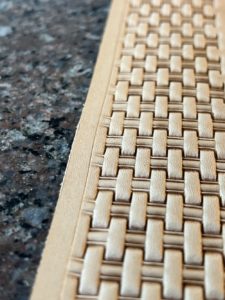
Step 16:
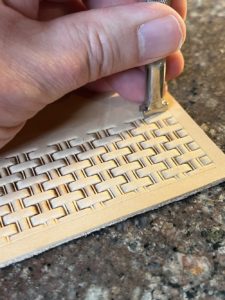
Now I flip the whole project around and repeat the process on the other side. Again I start on the right and add impressions moving toward the left.
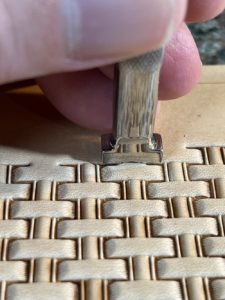
Just like before I center the stamp between the two impressions and keep the side of the stamp aligned straight with the existing impressions.
Step 17:
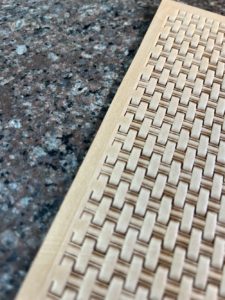
The other side is filled with impressions just like we did on the other side.
Step 18:
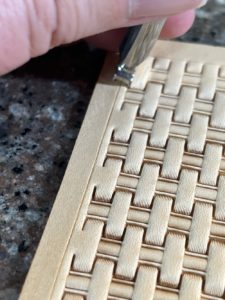
This time the whole stamp impressions came out pretty close to the border. I could probably get by without stamping any more but I’m going to go ahead and stamp partial impressions along the border by tilting the tool. I always try to get my stamps as close to the border as possible.
Step 18:
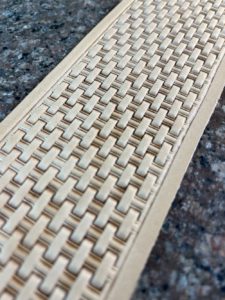
The basket stamping part is finished. Now to finish things up I bevel the border all around the edges of the basket stamped area.
Step 19:
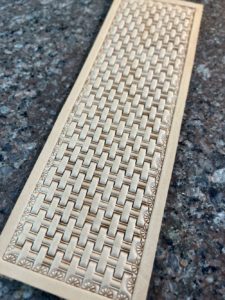
Finally, pick a border stamp and stamp it around all the edges.
That is all the steps I go through, Yes there are a lot of details to keep track of and at first things go pretty slowly but after a little practice doing these steps becomes routine and it goes much quicker and
